

Course building and management
Adjusting the course menu
Utrecht University works with a standard course template (course menu). This chapter describes how you can adjust the course template.
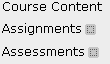
Empty menu options
If a menu option doesn’t contain any material, the option will be hidden to students. If the Edit Mode is turned ON, the instructor will see a grey square after the option.
You can check what students see by turning the Edit Mode OFF.
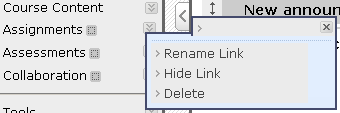
Removing an option
- Make sure that the Edit Mode is turned ON.
- Click on the double arrow after the menu option you wish to remove.

- Select Delete
- If there is any material in the Content Area, you will receive a warning, e.g.:
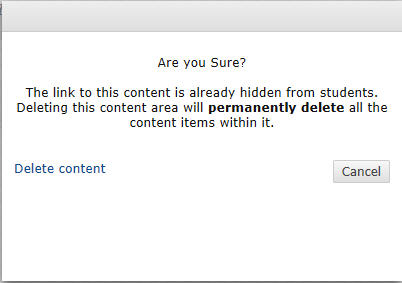
If you click Delete Content, all materials will be removed.
Hiding an option
If you don’t want to delete the content, you can hide an option. It will remain visible and available to the instructor, but students will no longer be able to see it:
- Make sure that the Edit Mode is turned ON.
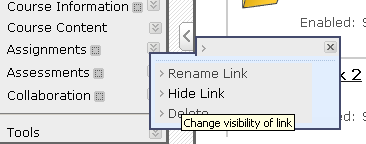
- Click on the double arrow after the menu option you wish to hide.

- Select Hide Link.
Renaming an option
The procedure for renaming an option is similar to what has been described before, only this time you select Rename Link. You can just overwrite the old name.
![]()
Press Enter or click on the box with the green tick to confirm the new name.
Adding an option
Various options can be added to the menu:
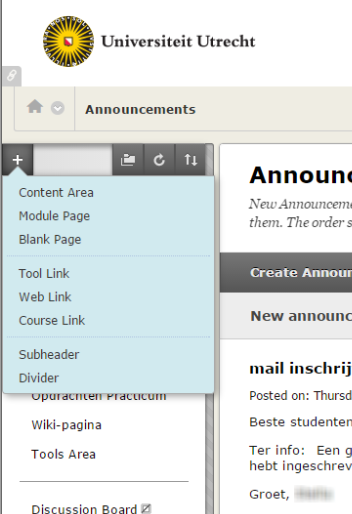
- Make sure the Edit Mode is turned ON
- Move your cursor to the plus symbol at the top of the menu.
- The roll-out menu folds open. The options are explained below.
| Create Content Area | Creates a new Content Area. The same options apply as described in Course Information. |
| Create Blank Page | Creates an empty page in the menu. On the page, you can place texts and attachments. (In a similar way as placing a new item in a Content Area.) |
| Create Tool Link | Creates tools that are directly accessible from the course menu, for example: Announcements, Blogs, Discussion Boards or Wikis. Some of these are described in this manual. Students can also access the tools via the Tools menu option. |
| Create Course Link | Creates a link in the course menu to a place in the same course. |
| Create External Link | Creates a link in the course menu to a random web page. |
| Create Module Page | Creates a page in the course menu where modules can be placed. |
| Create Subheader | Creates a non-clickable subheader in the course menu. |
| Create Divider | Creates a dividing line between menu items. |
Moving an option
To the left of each menu option, you see an arrow.
By dragging the arrow with your mouse, you can rearrange the order of the options.
Design of the menu and the course
The design of the menu and the course can be adjusted in the following way:
Open Customization in the Control Panel and then click on Teaching Style.
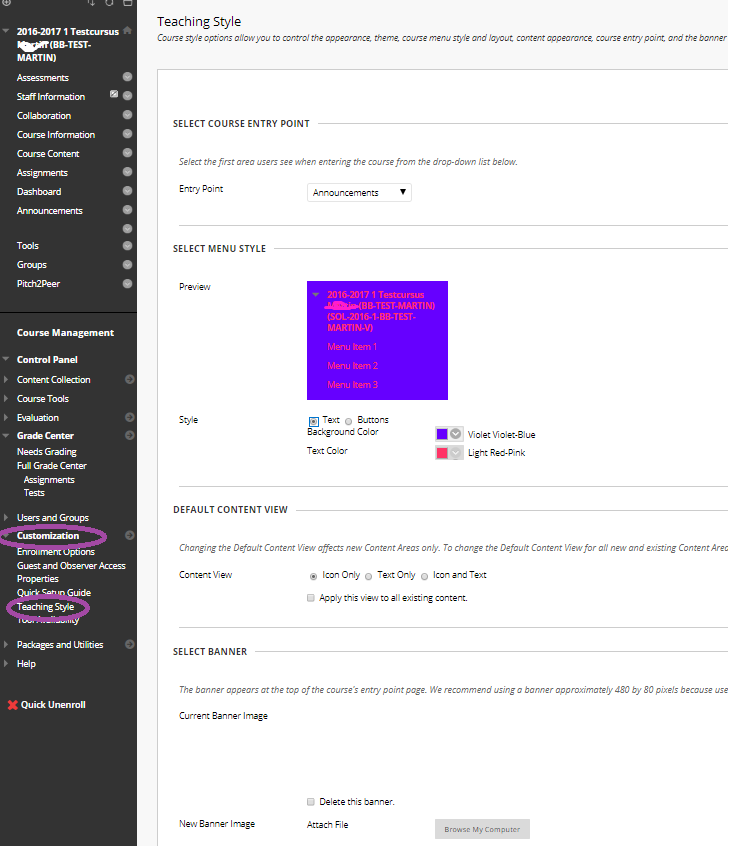
- Via Entry Point you can choose which page the students should see first when they open the course.
- With Select Menu Style you can set the color of the course menu and the text. Unfortunately the Buttons option cannot be used, if you use these options, the menu color will be reset to standard.
- With Select Banner, the course can give a different Banner.