

Course building and management
Grade Center: Smart Views
Smart Views are a very useful extension to the Grade Center. With Smart Views, you can make selections within the Grade Center, so that, for instance, an instructor will only see his or her own group of students. A Smart View that has been created can be selected directly via the Grade Center under Course Management. Different kinds of views can be created, e.g. based on groups, on individual students, on results etc. Below these possibilities are shown.
Filtering by groups
- From the Manage roll-out menu, select Smart Views

- In the next screen, click on Create Smart View
You will see the following screen:
- Now proceed as follows:
- Under Name, give the Smart View a name, like Basic Courses in the example. You can also add a description.
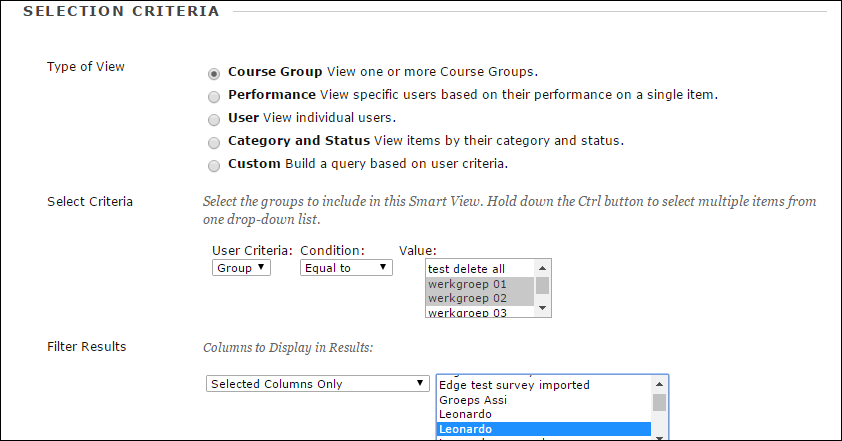
- Under Selection Criteria, go to Select Criteria and select Course Group.
- Select one or several groups to be shown in the view.
- Specify which columns should be shown in the Smart View. In the example we used the option Selected Columns Only to chose for two columns.
- Press Submit.
Check wether the desired result has been achieved by clicking on the name of the Smart View. If you mark a Smart View as Favorite, you can directly click on it from the Grade Center under Course Management (see the image below). You can do this by selecting Add as Favorite in the Smart Views screen.

Filtering by grades
For other Smart Views, the first steps are the same. In order to filter by grades, you need to do the following:
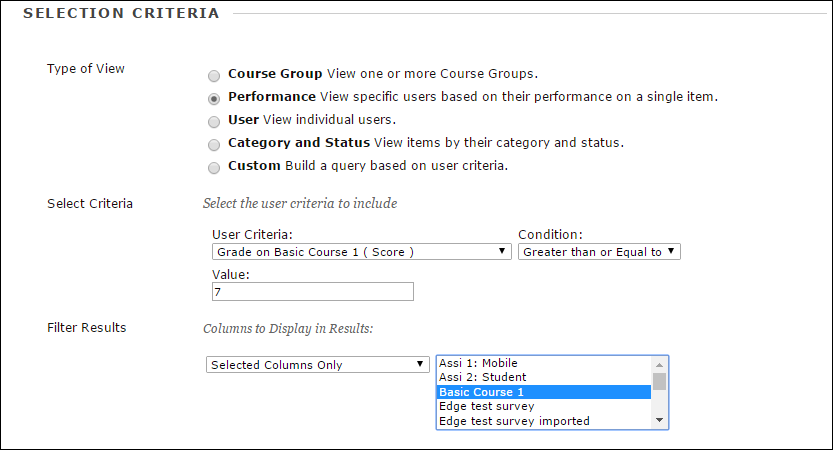
- Under Type of View, select Performance
- The options under Select Criteria will change.
Under User Criteria, select the relevant column from the roll-out menu - Under Condition, select one of the options from the roll-out menu (e.g., Equal to or Greater than)
- Under Value, specify the value(s) with which the grade should comply
- Specify which columns should be shown in the Smart View
- Press Submit
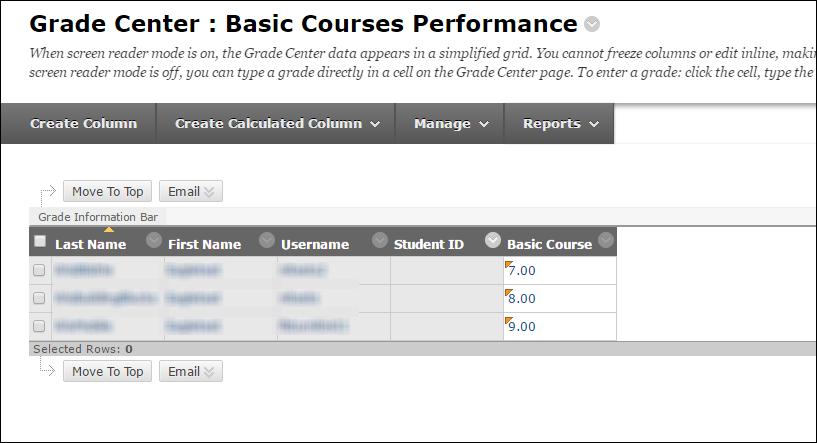
- Check to see if the desired result has been achieved by clicking on the name of the Smart View in question, or by selecting this view under Current View
The images below illustrate this Smart View’s creation and result in the Grade Center.
Filtering by individual participants
- As described above, but now select User under Type of View.
The screen will adjust to your choice - Select the participants you want to see in the Smart View
Filtering by Category
- As described above, but now select Category and Status under Type of View.
The screen will adjust to your choice - Select the categories and participants or groups that you want to see in the Smart View
Filtering by other criteria
You can also filter by criteria that you have chosen yourself:
- Under Type of View, select Custom.
The options under Select Criteria will change - Formulate the first criterion
- If you want the selection to be based on several criteria, click on Add User Criteria.
You may add more criteria in the same way - If you have selected several criteria, you can specify in the Formula Editor how these criteria should be connected with each other (for instance, (1 AND 2) OR (3 AND 4))