Course building and management
Course Content
Placing course materials, such as readers, course documents and PowerPoint presentations, is probably one of the actions instructors most frequently carry out in Blackboard. You can place materials in the following way:
- Make sure that the Edit Mode is turned ON
- In the course menu, click on Course Content. (NB: The same procedure applies to Course Information, Assignments and Assessments.)
- Some faculties offer a default folder structure within Course Content, for example with folders name ‘Week 1’, ‘Week 2’, etc. If this is the case in your course, click one of these folders and then point the cursor to ‘Build Content’. When there are no folders, click ‘Build Content’.
- The following menu will then be displayed.

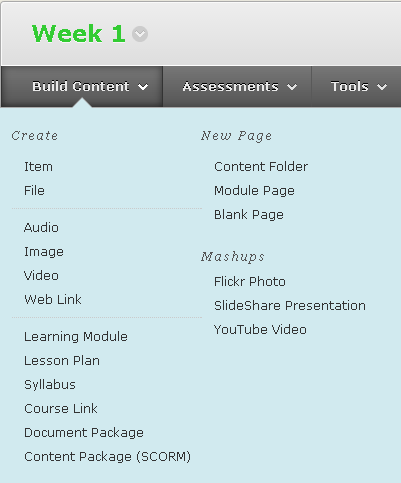
Below, you will find an overview of the various options:
| Create | Item | The most commonly used option, which you can use to place documents and explanatory texts. You can insert links, images and other multimedia into the text. HTML can be used to refer to streaming media, etc. |
| File | For placing a file without explanation. | |
| Audio | For placing a sound file without explanation. | |
| Image | For placing an image without explanation. | |
| Video | For placing a video file without explanation. | |
| Web link | For placing a reference to a web page (link). You may add an explanation. | |
| Learning Module | A tool for offering a collection of course materials in a certain order. | |
| Lesson Plan | A tool for providing structured information about learning objectives, level, assessment method, etc. | |
| Syllabus | A tool for providing structured information about the course, the classes, the required materials, reading list, timetables, etc. | |
| Course Link | For internal links to materials in a different location within the same course. | |
| New Page | Content Folder | For creating folders and subfolders in a Content Area. This is a valuable tool that helps ensure a good overview of all course materials. |
| Blank Page | Inserts a page in a Content Area for texts and attachments. Very similar to Item. | |
| Module Page | Inserts a page in a Content Area where Blackboard modules such as “What’s new” and “To Do” can be placed. | |
| Tools Area | For placing shortcuts to certain tools for students, such as “My Grades”, “Email” and “Wikis”. These tools are also available to students via the Tools option in the course menu. | |
| Mashups | Flickr Photo | Quick and easy way to find photos on the Flickr website and then place them in the Course. |
| SlideShare Presentation | Quick and easy way to find presentations on the SlideShare website and then place them in the Course. | |
| YouTube Video | Quick and easy way to find videos on YouTube and then place them in the Course. |
In the following sections, the most commonly used options for placing materials will be discussed in detail.
Placing an Item
There are several ways to place materials under an Item:
- Directly type text or copy it from documents
- Place a link to documents (e.g., Word, PowerPoint or PDF documents)
- Links to interesting websites
- Combine text, links and multimedia files (sound, video)
- Make sure that the Edit Mode is turned ON.
- Select Course Content in the course menu. Then go to the Content Area in which you want to place the material. If necessary, navigate to a folder or subfolder.
- Move your cursor to the Build Content button.
A selection menu will fold out:

- Click on Item.
- This brings you to a screen where you can type text and select attachments.
- Type a title in the Name field.
- Type a text in the Text field.

Placing a link to a file
You will often only write or copy a short text to accompany the file you are making available. In such cases, the file will be added to the Item as an attachment and copied to the server. Students can open it by clicking on a link. For example, you can attach a Word document as follows:
- Scroll to 2. Attachments

- Click on the Browse My Computer button and select the relevant file on your computer. If necessary, you can attach several files in one go. All attachments are saved in Blackboard in the content system under Course Files.
- Finally, via Options you can specify whether:
- the Item should be available: Permit Users to view this Content
- the number of times that an Item is opened needs to be tracked: Track number of views
- the item should only be available within a certain timeframe: Select date and time restrictions
- Click on Submit at the top or bottom of the screen to send everything to the server and check the result.
Text Box Editor
De WYSIWYG (What You See Is What You Get) editor, which is used to insert texts into Blackboard, contains a number of menu bars that will be briefly discussed here. You can find the menu bars above the text field.
ne or more menu bars may be folded up. If so, they can be folded out by means of this button on the right:
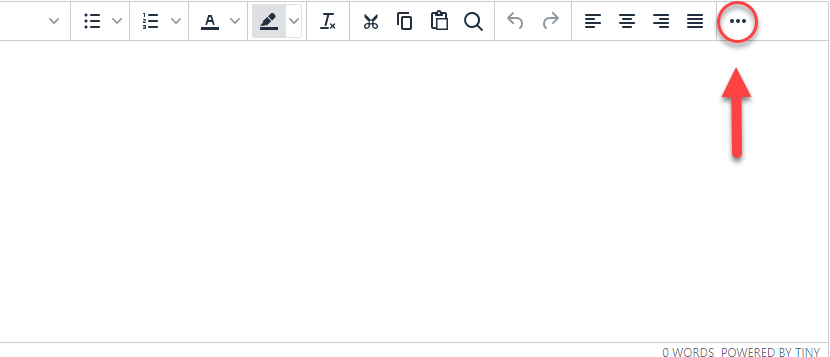
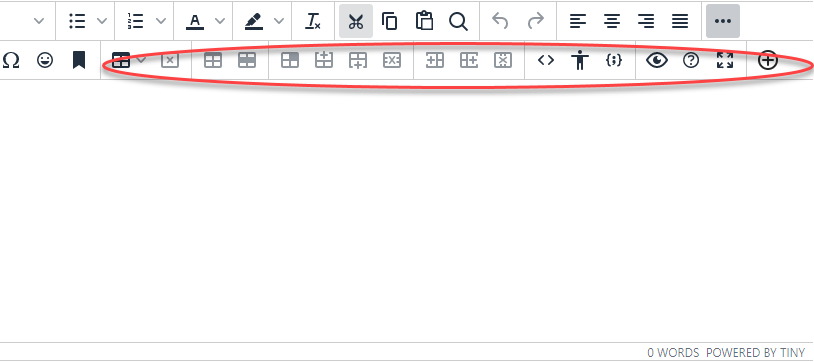
One or more menu bars may be folded up. If so, they can be folded out by means of the triangular buttons on the left.
tip
When copying from a Word document, layout problems may arise. This is caused by the fact that design coding from Word is copied along with the text. You can clean it up by first copying the text to Notepad (all layout codes will automatically be removed) and then copying this plain text from Notepad into Blackboard.
HTML
The source code of internet pages is created in HTML (HyperText Markup Language). This is a code that can be generated by a simple text program such as Notepad. A browser translates the HTML code into the layout page that you see.
If you place something into Blackboard, Blackboard will generate the required HTML code. You can view this code by clicking on the Source code button button in Blackboard’s editor:
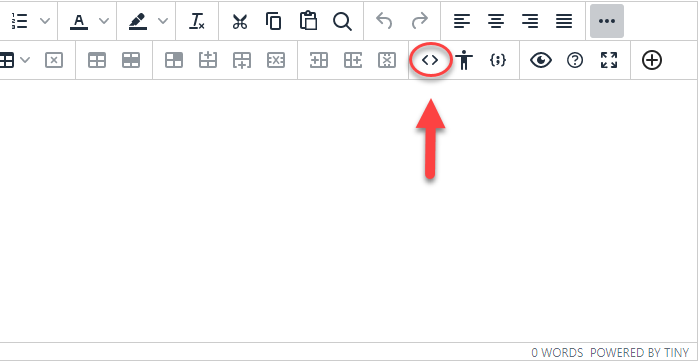
At times it may be convenient to search for certain layout characteristics directly in this code and possibly remove them, or to copy HTML code into this window.
Creating a link to a web page
If you want to point out interesting web pages to your students, you can provide a link to these pages:
- Make sure the Edit Mode is turned ON
- Select Course Content in the course menu, and possibly the folder or subfolder in which you wish to place the link.
- Move your cursor to the Build Content button.
- The following menu will fold out.
In the selection menu, click on URL (means Uniform Resource Locator, i.e. internet address) - Fill in the fields on the screen
NB! The URL should be complete, i.e. including http:// - In the Text field, you can write a comment about the web link.
- Click on Submit at the top or bottom of the screen.
Note
Note that this procedure is very similar to placing an Item. Here, too, you can add attachments. In an Item, you can also make references to websites using the Text Box Editor.
Creating folders
As more and more materials are added to the course, it gets harder to keep a good overview. A good folder structure can make it easier for both the instructor and the students to find the relevant materials. Folders may be sorted by content or by period. The folder structure can have multiple levels (folder in folder). And you can copy or move materials to other folders or learning environments.
- Make sure that the Edit Mode is ON.
- In the course menu, select Course Content or the folder in which you wish to place the link.
- Move your cursor to the Build Content button.
- In the menu that folds out, go to New Page and click on Content Folder. A screen opens so you can give the folder a name and describe its content.
Important
If necessary, briefly describe the folder’s content, but do not provide any further details. Content information should be given in the folder itself, not in the folder description! - Name the folder and click on Submit.
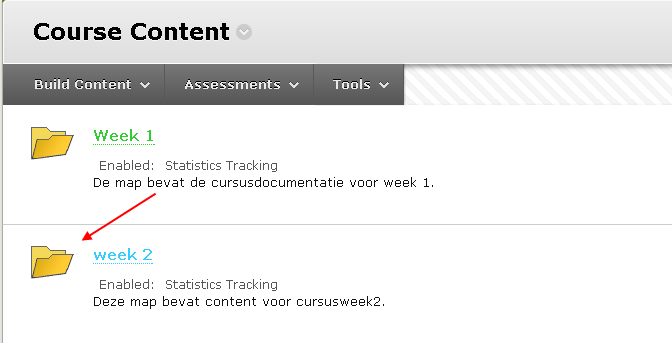
- The folder has been added at the bottom:

The folder can be moved by clicking on the double arrow and dragging it. - Open the folder you just created by clicking on its name.
- You can make a layered folder structure by placing more folders here (e.g., for documents and presentations).
The breadcrumb trail
As more folders are created, navigation becomes more complex and it takes more mouse clicks to get to the higher levels. To speed this up, Blackboard continuously keeps track of where you are in the folder structure. The “Breadcrumb Trail” on top of the screen shows you where you are.
![]()
This breadcrumb trail will help keep you from getting lost. You can also click on the crumbs to quickly jump to a higher level.
Placing mashups
Blackboard 9.1 makes it easy to refer to multimedia on Flickr, YouTube or SlideShare. These are websites where users can upload photos, videos and presentations respectively and share them with other internet users. A description of how to place a video from YouTube is given here. You can follow the same procedure for placing photos from Flickr or presentations from SlideShare.
- Make sure that the Edit Mode is turned ON.
- In the course menu, select Course Content and/or the folder in which you wish to place the video.
- Move your cursor to the Build Content button.
- In the menu that folds out, go to Mashups and click on YouTube Video. Within the Blackboard screen, a search screen appears for the YouTube collection:

- Fill in your search term and click on GO.
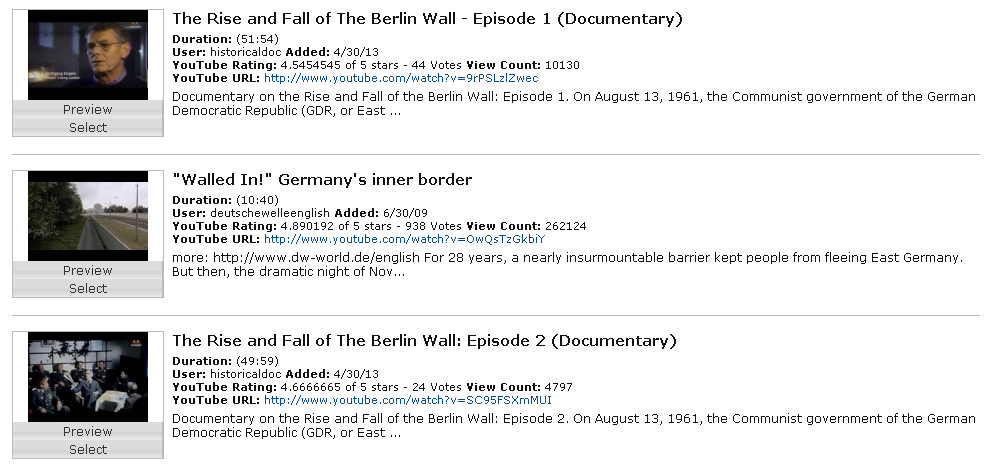
- A list of results is displayed:

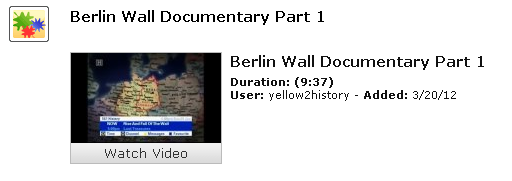
You can watch a video by clicking on the Preview button underneath the picture. - When you have found the right video, click on Select (under Preview).
- The video is now included in Blackboard.
- If you want, you can add a description in the Description field.
- Click on Submit
- The link to the video is now placed in the course and can be played directly.

Copying and moving
- You can copy or move materials you placed in a Blackboard learning environment. You can also exchange materials between various learning environments:
- Make sure that the Edit Mode is turned ON.
- In the course menu, select Course Content Area and/or the folder that contains the material to be copied.
- Press the the double arrow button after the item to be copied:
- A menu will fold out.
- Click on the Copy option.
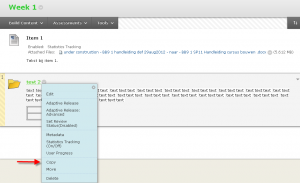
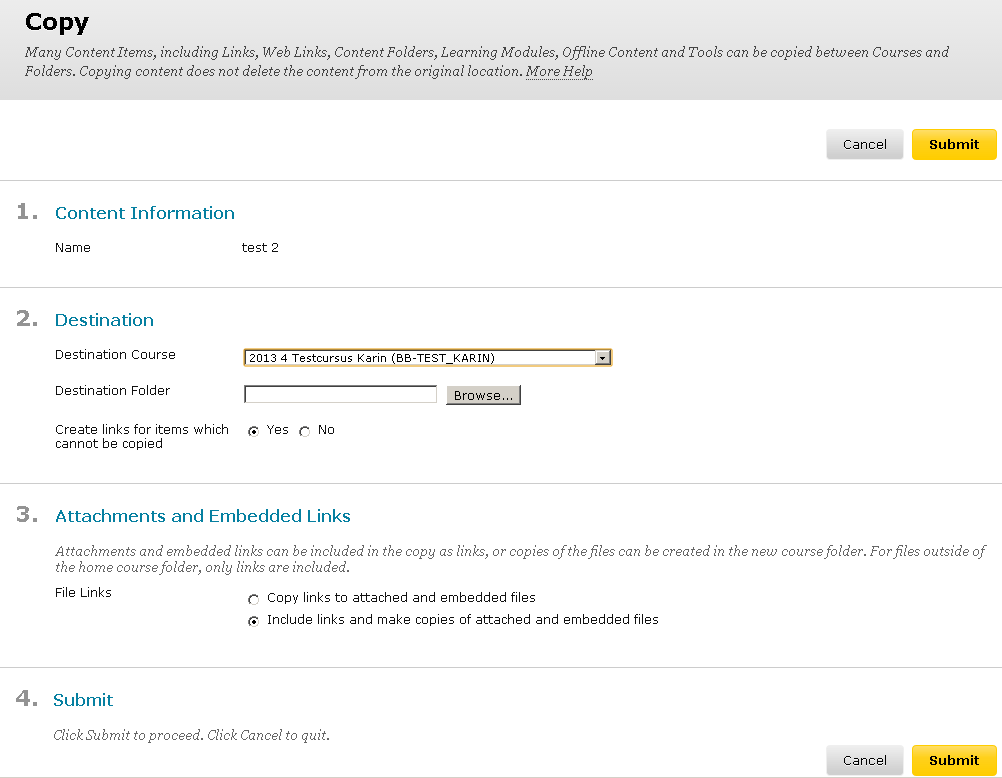
A screen will appear showing the content to be copied. You now need to specify where you want to copy this content to:

- If you are managing several courses, go to Destination Course to select the relevant target course.
- To specify the target folder in the course, click on the Browse button.
- A new window will show you the various parts of the course. You can view the deeper levels by clicking on the plus symbols.
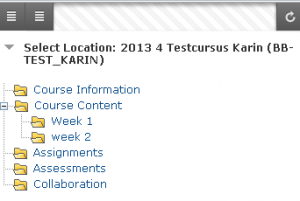
- Select the relevant folder in the course.
- The name will appear after Destination Folder.
- If you opt for Delete Item after copy, you are ‘moving’ the item rather than ‘copying’ it.
- Click on Submit.
- The item has been copied and you will receive a confirmation.
- Check that the item is now in the destination folder.