

Creating groups
Groups: importing and exporting
This article explains how to use the import/export functionality for groups. If you want to know more about the layout and functionality of the starting screen, or how to change the users in the groups, you will find more information in the article: “Group Management: Introduction“.
The contents of this article:
- How to import users in a group and how to make the importfile.
- How to export groups and users and how to show the result of the export action into Excel.
.
1/ Importing Users into Groups
A/ Procedure
Although we recommend to use the all users page to add users to groups, users can also be added to groups by import.
In order to perform an import, it is important to find out the code of the Desired group
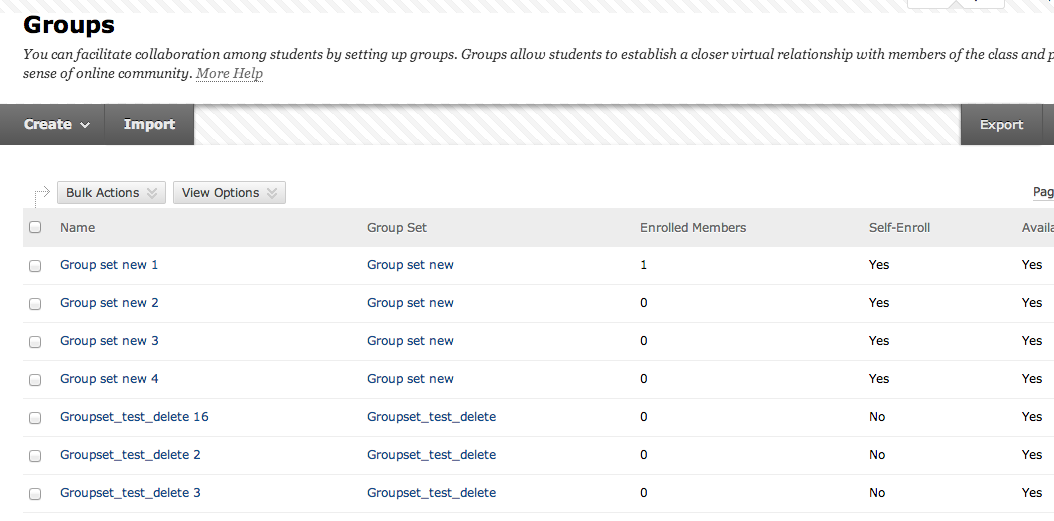
Go to the Groups page and select the desired group and go to View Options and select Show group code:
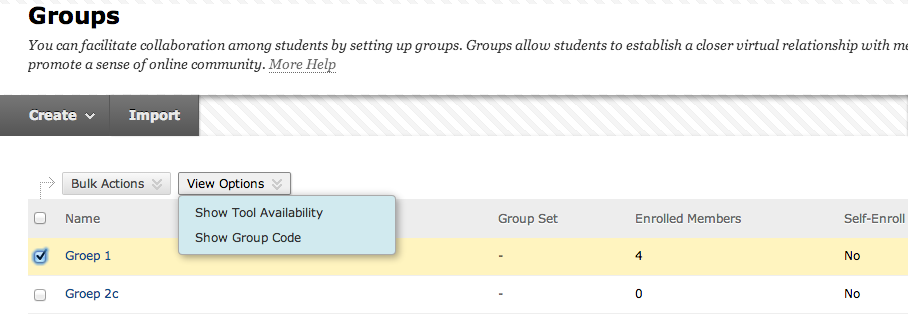
Een overzicht van de Group codes zal nu verschijnen:

In this example, the Groep_gc_1 code for Group 1.
Now choose Import at the top of this page to go the Group imports page.
Now you can select a file at Import.

The import file must be a .CSV file. An example of such a file can be found at the top of this page: help More:

Choose for Members to download the sample file:

The file sample_groupmembers.csv opens.
.
B/ Creating a custom CSV import file
The best way to create a CSV file to import members in to a group is to use Notepad or any other ASCII-editor. If you need to, you may use (change) the example given by Blackboard, that can be found in the Help section (click “More Help”). Beware: if you click the CSV-file, it opens in Excel although it is not native Excel! It is better to open it in the ASCII editor, especially because the CSV nature of the file needs to be kept (a CSV-file is a ASCII-type file, that contains delimiters to seperate data fields).
Open your editor and enter the data as follows:
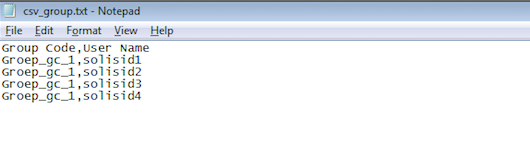
The image above shows Groep_gc_1 as the name of the group to which you add the users, solisid1 is the SolisID of the user: they are seperated by a comma. So this makes: Groep_gc_1, solisid1 Groep_gc_1, solisid2 etc.
When you have finished entering the list of users save the file as a .csv file.
Here the ”Save as type” option will be ”Text Documents (.txt)” : IMPORTANT: change the file extension in the naming from” txt” to” csv” as shown in the image:
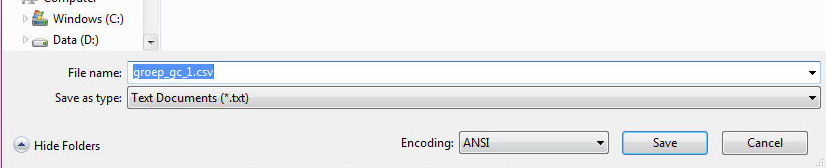
Choose ”Save”.
Now import the CSV file at import group members :
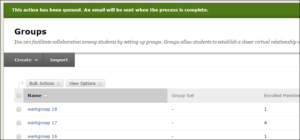
In the Groups list, you will now see the number of enrolled members that are added, the image shows Group 1 has 4 enrolled members:

Make sure the added users are the correct ones by clicking on the name of the group and choosing Edit Group.
At the label Members the overview of the group members is shown.
After a succesfull action, the message below will be issued:
.
2/ Exporting Groups and Users
A/ Procedure
It is possible to export all group information from Blackboard.
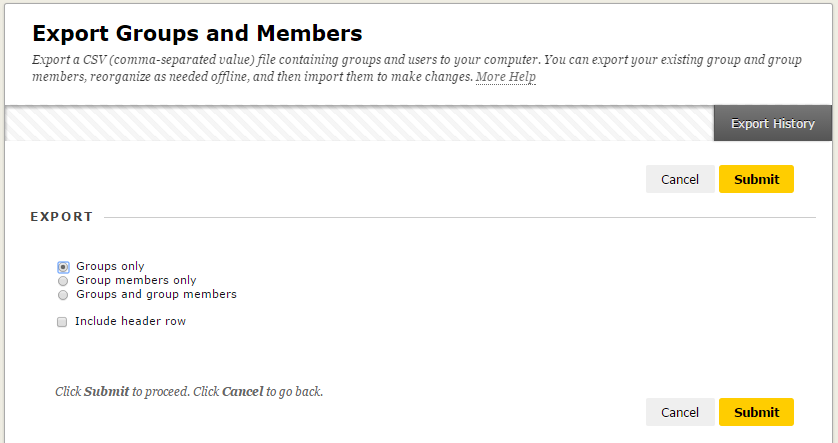
Go to the Groups page and choose export:
The following selection menu will appear: in the example we choose for Groups only, Include header row
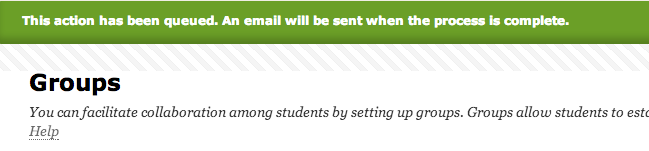
After choosing Submit the following message will appear:
After the file is created, this may take some time, you will receive an email with a .zip file as an attachment.:
![]()
Follow the instructions in the email to ”download ZIP file here”.
Converting a .CSV file into an excel file.
To use the exported .csv file as an excel file it needs to be imported into excel. Follow the instructions below to do this:
Open a new excel file and select ‘From Text’ under the Data tab.

Select the .csv file you wish to convert and select import.
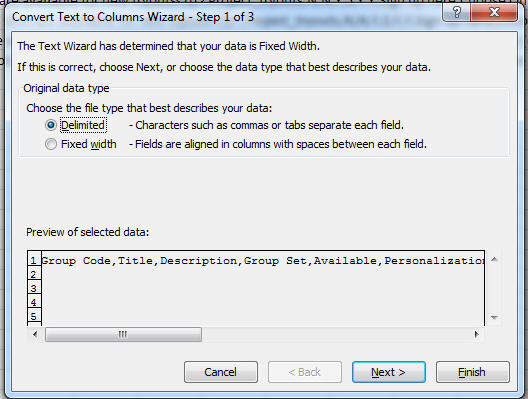
An import wizard will be opened. Choose Delimited and click Next.
On the next page check Comma instead of Tab, as shown below.

Click on Finish.
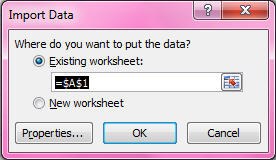
In the next pop-up click OK.
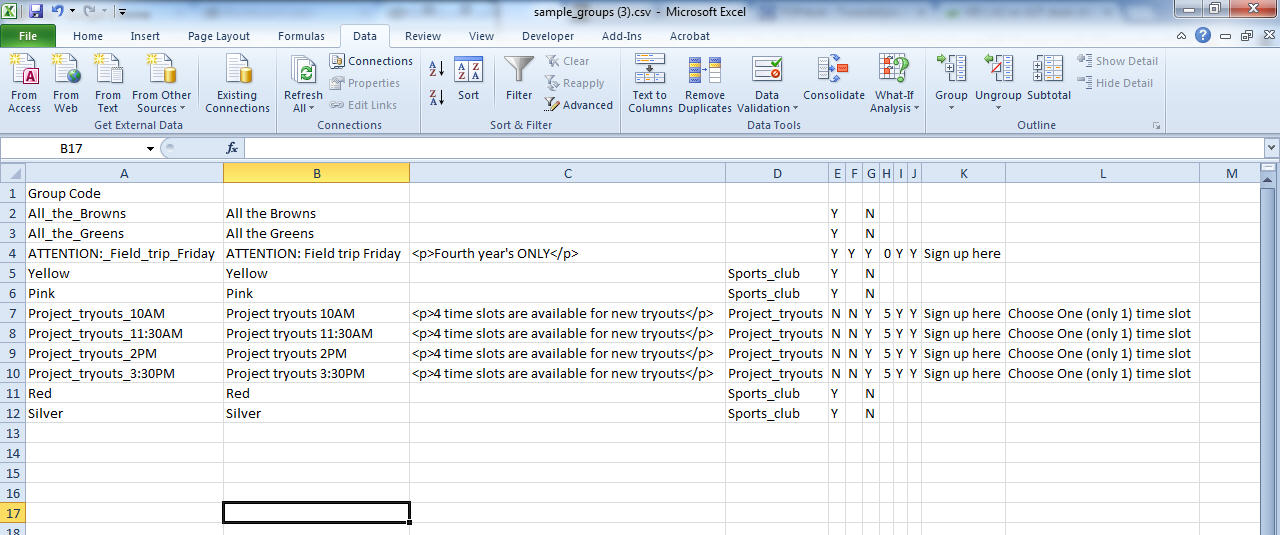
The result is a regular Excel file, as shown below.
You can now save the file as .XLS or .XLSX.